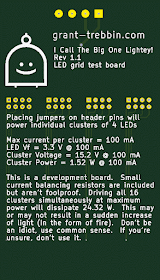
A quick post today. I was discussing the idea of an illuminated display recently and was unsure of how bright LEDs would appear when driven with different currents. After looking around, I found some nice 100mA white LED devices and thought I'd make a PCB to do some tests. My original plan was to make a 7x7 grid of 4 LED clusters for a total of 196 lights, but the price of the PCB was too much. As I'm using a prototyping service that gives me 5 copies of the board I decided to break it up into smaller boards that could be tiled.
As this was for testing, I wanted the lights to be configurable, so each cluster of 4 LED's goes to a standard pin header. To power a cluster, you just add a jumper to the header. Simple. The board also includes some current limiting resistors to help current sharing, but the board isn't designed to be a standalone device, and needs external control to be driven properly. This is why the header pins are in between the LEDs and the resistors. If needed an external connector and be plugged onto the header pins to drive the LEDs, removing the resistors from the circuit.
After weighing up my objectives I decided to use 20 ohm resistors to limit the current, but at 100 mA the dissipated power would be 0.2 Watt. It turned out to be more economical and flexible to use 2 x 10 ohm resistors instead of 1 x 20 ohm.
 |
| Top Layer |
Breaking the board up into smaller portions is probably a blessing. I'm not even sure I can solder these let alone a board that had something like 300 components, but I'll give it a shot.
When designing boards, if possible, write some notes on them so you'll know how to use them in the future.
 |
| Bottom Layer |
 |
| Tiled PCBs |

No comments:
Post a Comment
Note: Only a member of this blog may post a comment.